

The Golden Rule: 24 Hours or Bust
This is the most important thing you need to remember – you have exactly 24 hours from when the trip ends to report damage through the Turo app. Not 25 hours. Not “first thing Monday morning when I’m back at my computer.” Twenty-four hours, period.
I almost missed this deadline once when I discovered damage on a Sunday evening after a weekend trip ended Saturday afternoon. I was tempted to wait until Monday to deal with it properly, but thankfully I remembered this strict rule and filed the report at 11 PM Sunday night. Missing this deadline can void your coverage entirely, which would have been a costly mistake.
Set a phone reminder if you need to. Take this deadline seriously. Turo doesn’t budge on it.
Before Every Single Trip: Documentation Is Everything
The claims process actually starts well before your guest even picks up the car. You need rock-solid documentation of your vehicle’s condition, and I mean really detailed photos from multiple angles and lighting conditions.
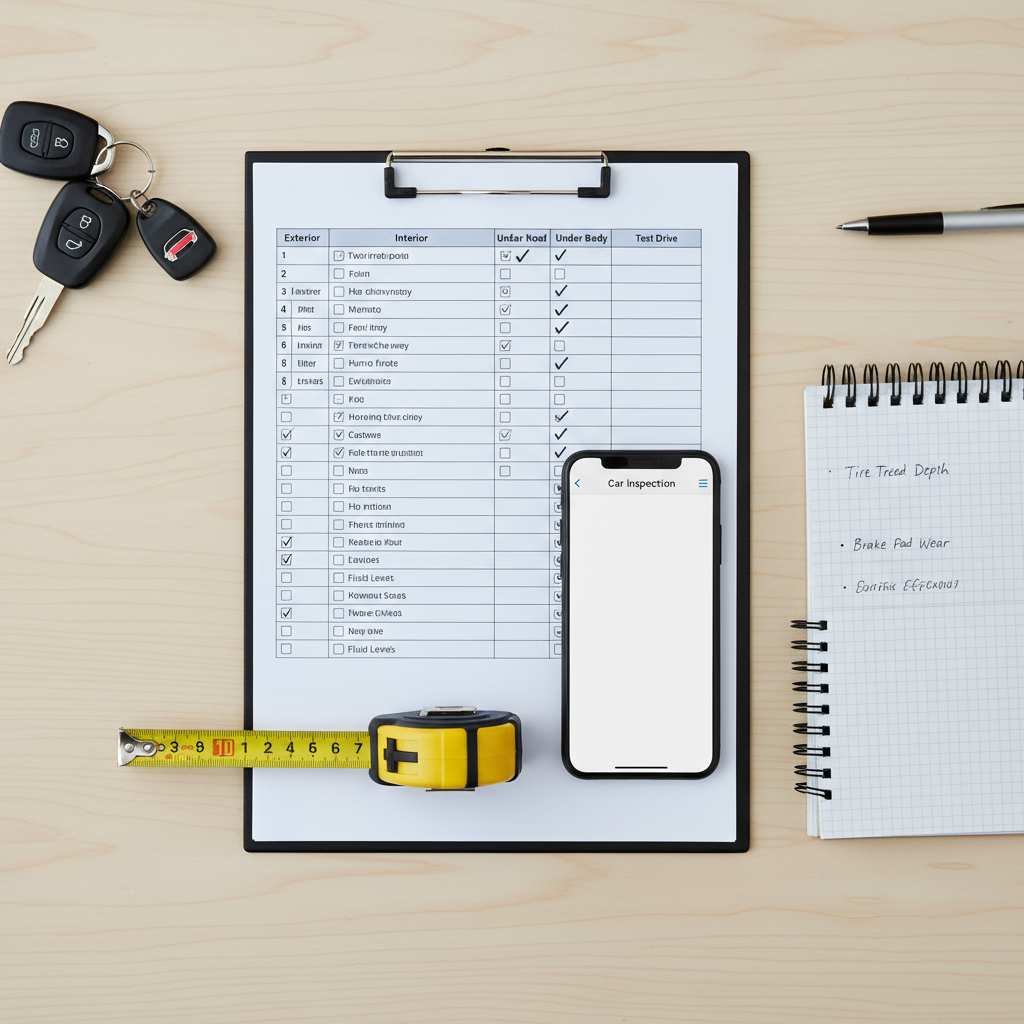
Pre-Trip Photo Checklist
- All four corners of the vehicle (close-up and wide angle)
- Each wheel and rim individually
- Front and rear bumpers from multiple angles
- Both headlights and taillights
- All four door panels
- Interior seats, dashboard, and center console
- Trunk or cargo area
- Any existing damage (yes, document the stuff that’s already wrong)
- Odometer reading with timestamp
- Fuel level gauge clearly visible
- Roof and windshield
I use a systematic approach now – I start at the driver’s front corner and work my way clockwise around the car, then do interior shots last. Takes about 5-7 minutes but saves hours of headaches and potential disputes later. Some hosts I know take 200-300 photos per checkout, which might seem excessive, but guests actually appreciate the thoroughness.

When You Discover Damage: Don’t Panic (Easier Said Than Done)
First thing – breathe. I know that immediate rush of panic and frustration when you see something wrong with your car. But staying calm and methodically following the process is crucial for getting properly compensated and maintaining your hosting reputation.
Immediate Steps Within Minutes of Discovery
- Take photos immediately – Document the damage from multiple angles, include close-ups and context shots
- Note the exact time and location where you discovered it
- Don’t drive the car if the damage might be safety-related or could worsen
- Check your pre-trip photos to confirm the damage is new
- Open the Turo app and prepare to start the damage report process
Filing the Damage Report: Detailed Step-by-Step
Here’s exactly how the process works once you’re ready to file. I’m going to be very specific because missing steps can delay your claim.
Step 1: Access the Reporting System
In the Turo app (or website if you prefer desktop), navigate to your completed trips. Find the specific trip where damage occurred and tap or click to open trip details. Look for “Report an issue” or “Report damage” – the exact wording has changed a few times, but it’s usually pretty obvious.
Choose “Vehicle damage” from the options presented. The app will ask when you discovered the damage – be honest and specific. Don’t try to fudge this.
Step 2: Upload Comprehensive Photos
This is where your pre-trip documentation becomes absolutely crucial. You need to upload:
- Pre-trip photos showing the area was undamaged before the trip
- Post-trip photos showing the new damage clearly
- Close-up shots of the specific damage with a measuring tape if possible
- Wide shots showing the damage in context of the whole vehicle
- Multiple angles of the same damage area
The app can be finicky about photo uploads sometimes, particularly if you’re on spotty wifi. If you’re having trouble, try reducing the file size, uploading one at a time, or switching between wifi and cellular data. I’ve found that photos under 5MB each upload more reliably.
Pro tip: Take a short video walking around the damage as well. While Turo primarily wants photos, having video backup can be helpful if there are disputes about the extent of damage.
Step 3: Write a Clear, Factual Description
Describe what happened in clear, objective language. Stick to what you can observe and verify – don’t speculate about how it happened unless you have concrete evidence or the guest admitted fault.
Good example: “Discovered 6-inch scratch on passenger rear door after trip ended at 2:15 PM on October 20th. Damage was not present in pre-trip photos taken at 10:00 AM on October 18th. Scratch appears to go through clear coat to primer. Guest has not responded to messages about the damage.”
Bad example: “Guest must have hit something in a parking lot and didn’t tell me. They’re totally irresponsible and I want them charged for everything.”
Keep emotions out of it, even if you’re frustrated. Just facts.
Step 4: Choose Your Resolution Path
Turo will typically give you two options at this stage:
Option A: Resolve with guest directly – You and the guest work out payment between yourselves without Turo’s direct involvement. This can be faster for minor damage and sometimes more profitable for both parties.
Option B: File a claim through Turo – Turo handles everything through their claims process. You’ll pay your deductible, and Turo manages the guest payment and reimbursement to you.
Important caveat: If the guest purchased a protection plan (Premier, Standard, or Minimum), you might not have the option to resolve directly. Their protection plan kicks in and Turo manages the entire process.
Working Directly with the Guest (When It Makes Sense)
For minor damage below your deductible amount, working directly with the guest can sometimes be the better path. I’ve had decent luck with this approach for small scratches, minor dings, and cosmetic issues.
When Direct Resolution Makes Sense
- Damage repair cost is less than your deductible (why pay $750 deductible for $400 damage?)
- Guest is responsive and acknowledges responsibility quickly
- Repair cost is relatively small and straightforward ($200-500 range)
- You have a good rapport with the guest
- Guest didn’t purchase a protection plan
How to Handle Direct Payment Properly
Get repair estimates from at least 2-3 reputable shops in your area. Share these estimates with the guest via the Turo messaging system (keep everything documented). Agree on a fair amount that covers actual repair costs.
Use trackable payment methods like Venmo, Zelle, PayPal, or even a personal check. Never accept cash without a signed receipt. Get the payment in writing somehow.
Important timeline: You have 20 days to resolve directly after reporting the damage to Turo. If the guest stops responding, disputes the cost, or refuses to pay within this window, you can escalate to Turo to take over the claim. Don’t wait until day 19 to do this.

Going Through Turo’s Official Claims Process
If you choose to file a claim through Turo (or if direct resolution fails), here’s what happens next:
Stage 1: Turo Reviews Eligibility
Turo will review your damage report and determine if the damage is covered under your protection plan. This usually takes 1-2 business days, though I’ve seen it happen faster for straightforward cases.
They’re checking:
- Was damage reported within 24 hours?
- Is the damage clearly documented?
- Does it fall within covered damage types?
- Are pre-trip photos available proving damage is new?
Stage 2: Third-Party Assessment
If eligible, Turo sends your case to a third-party appraiser (often a company called SnapSheet) who creates a damage estimate using your photos. For major damage exceeding a certain threshold, they might require an in-person inspection at an approved shop.
Here’s something I learned: these photo-based estimates are often lower than what actual repairs cost. The appraiser can’t see everything in photos that a body shop discovers when they start work. This is normal – shops can request “supplemental” estimates for additional damage found during repair.
Stage 3: Review and Approval
Turo will send you the damage estimate. You can either accept it or dispute it if you think it’s significantly too low. If you dispute, be prepared to provide additional evidence or estimates from certified repair shops.
Once you accept the estimate, Turo processes payment. You’ll pay your deductible amount, and they handle collecting from the guest or guest’s protection plan.
Stage 4: Repairs and Reimbursement
Take your car to an approved repair shop or one of your choosing (check Turo’s current policies on this). The shop does the work and bills Turo directly, or you pay and get reimbursed.
The whole process typically takes 5-10 business days for straightforward claims, though complex cases involving disputes, injuries, or total losses can take significantly longer – sometimes weeks or even months.
Common Mistakes That Can Torpedo Your Claim
Not taking enough pre-trip photos. I cannot stress this enough – without clear before photos, you have no proof the damage wasn’t pre-existing. Turo will likely deny your claim or significantly reduce the payout.
Missing the 24-hour deadline. I’ve seen hosts lose thousands of dollars because they waited 26 or 30 hours to report damage. Turo is strict about this timing.
Poor photo quality or missing details. Blurry, dark, or unclear photos make it very hard for appraisers to assess damage properly. Use good lighting, multiple angles, and include measuring tape when possible.
Accepting partial payment from guest then filing claim. If you accept any money from the guest, even $20, it can complicate or invalidate a Turo claim. Choose your path and stick with it.
Continuing to host a damaged vehicle. If you don’t report damage and keep renting the car, Turo might deny future claims for that area. They’ll argue you accepted the damage as-is.
Not understanding their deductible amount. Know exactly what you’ll pay out of pocket before filing. Make sure you understand how Turo deductibles work and what you’ll actually pay.
Filing claims for wear and tear. Small scratches under 3 inches, normal interior wear, minor scuffs – these aren’t covered. Filing frivolous claims damages your credibility.
What About Normal Wear and Tear?
Here’s something that trips up a lot of hosts, particularly newer ones – Turo doesn’t cover normal wear and tear. This includes:
- Scratches or dings under 3 inches
- Normal interior wear (slight seat compression, minor dashboard wear)
- Tire wear from normal driving
- Minor scuffs on bumpers or trim pieces
- Small stone chips on the hood or windshield
- Light fading or discoloration from sun exposure
If you try to claim this stuff, Turo will deny it pretty quickly, and you might hurt your credibility for future legitimate claims. Accept that some minor wear is just part of hosting.
Dealing with Difficult or Unresponsive Guests
Sometimes guests deny responsibility, become unresponsive, or actively dispute your damage claim. This is frustrating, but here’s how I’ve learned to handle it:
Stay professional always. Getting angry, accusatory, or emotional never helps your case. It might feel satisfying in the moment, but it can backfire.
Stick to documented facts. Present evidence calmly – photos with timestamps, repair estimates from reputable shops, timeline of events. Let the evidence speak for itself.
Set clear deadlines. Give the guest a reasonable timeframe to respond (48-72 hours is fair), then escalate to Turo if they don’t engage. Document that you gave them a chance.
Keep everything in the Turo messaging system. Don’t move conversations to text message, phone calls, or email. Keep it in-app where Turo can see the full exchange if needed.
Screenshot everything. Save copies of all messages, photos shared, and guest responses (or lack thereof). You might need these later.

Special Situations and Edge Cases
Damage Discovered During a Trip
If the guest reports damage themselves during an active trip, document it immediately through Turo messaging. Take photos if you can get to the vehicle, or ask the guest to provide detailed photos. This starts the clock differently than end-of-trip claims.
Guest Returns Car Late/You Can’t Inspect Immediately
If the guest returns the car at midnight or you can’t inspect it right away, make sure to note this in your claim. Your 24-hour window starts when the trip officially ends, not when you physically see the car.
Damage Found Days Later
This is tricky. If you did your check-in inspection and somehow missed damage, you’re probably out of luck. The 24-hour window has passed. This is why thorough inspections are critical.
Third-Party Involvement (Accidents with Other Vehicles)
If your guest was in an accident involving another party, the claim process gets more complex. Police reports become crucial. The guest’s (or your) protection plan should cover liability, but documentation is even more important.
After the Claim: Getting Back to Business
Once your claim is resolved and repairs are complete, take time to update your vehicle photos and inspection process. Use this experience as a learning opportunity.
Ask yourself:
- Could I have prevented this damage somehow?
- Was my photo documentation sufficient?
- Did I screen the guest properly?
- Do I need better lighting for my inspection photos?
- Should I adjust my protection plan level?
Don’t let one bad experience sour you on hosting entirely. Most trips go smoothly, and having proper protection and documentation processes means you can handle the occasional issue without major financial stress.
Red Flags to Watch For
Based on my experience and talking with other hosts, here are warning signs that a guest might be trouble:
- Brand new Turo account with no reviews
- Requesting to communicate outside the app
- Asking detailed questions about your insurance/protection plan
- Trying to extend trip multiple times
- Returning car late without good communication
- Being evasive about pickup/return locations
Trust your gut. If something feels off, it’s okay to decline a booking.
Documentation Best Practices for Serious Hosts
If you’re treating Turo hosting as a real business, consider these advanced documentation strategies:
Video Walkarounds
In addition to photos, do a 2-3 minute video walkthrough showing the entire vehicle exterior and interior. Timestamp matters, so make sure your phone’s date/time shows in the video.
Damage Checklist System
Create a standardized checklist you use for every single checkout. Check the same areas in the same order every time. This creates consistency and you’re less likely to miss something.
Third-Party Apps
Some hosts use apps like Turo CheckMate or similar services that create timestamped, organized photo sets. These can be worth the small monthly fee if you host multiple vehicles.
Condition Report Forms
Have guests sign a condition report at pickup acknowledging existing damage and vehicle condition. While not always enforceable, it creates another layer of documentation.
Understanding the Appeals Process
If Turo denies your claim or offers a payout you think is unfair, you can appeal. Here’s how:
- Request a formal review in writing through the Turo claims portal
- Provide additional evidence – more photos, repair estimates, expert opinions
- Cite specific policy language that supports your position
- Be patient – appeals can take 2-3 weeks or longer
Sometimes getting a second opinion from an independent appraiser can help your case, though you’ll pay for this out of pocket initially.
How Claims Affect Your Hosting
Multiple claims can potentially affect your hosting status or search ranking on Turo, though the exact algorithms aren’t public. From what I’ve observed:
- One or two claims per year seems normal and doesn’t hurt you
- Multiple claims in a short period might trigger additional scrutiny
- Filing frivolous claims that get denied can damage your reputation
- Being professional throughout the process helps maintain your standing
The Bottom Line on Turo Claims
The claims process is actually pretty straightforward if you follow the rules: document everything obsessively, report within 24 hours, provide clear evidence, and stay professional throughout.
Most claims resolve fairly smoothly when hosts have proper documentation. The problems arise when hosts cut corners on pre-trip photos, miss deadlines, or try to claim wear and tear as damage.
Think of thorough documentation as insurance for your insurance. Yes, it takes 5-10 minutes per trip. But that time investment pays off massively when you actually need to file a claim.
And remember – the goal isn’t to avoid claims entirely (some damage is inevitable when you host regularly). The goal is to handle claims professionally and efficiently when they do occur, protecting your investment while maintaining good relationships with guests and Turo.
For more comprehensive context on how claims fit into the bigger insurance picture, check out our complete guide to Turo car insurance. You might also want to learn more about choosing the right protection plan for your situation and understanding exactly what you’ll pay in different damage scenarios.
The key is being prepared and following the established process every single time. Document thoroughly, report quickly, stay professional, and trust the system. Do this right, and the claims process becomes just another manageable part of running a successful Turo hosting business.